Showing posts with label stuff i made. Show all posts

Monday, December 27, 2010

How to make a Barbie dream house

I've been bursting to show off some of my DIY Christmas gifts, but had to wait until after the big day so I wouldn't spoil any surprises. I did quite a few homemade, or custom created gifts this year. This one is a collaboration with my friend, Kim.

She wanted to give her 5-year-old twins a Barbie dream-house for Christmas, but didn't want to break the bank on something that might break easily. With four kids, she knows delicate a plastic dollhouse wouldn't last long. So we embarked on a shopping adventure to find the right tools to build our own, sturdier version.
Originally, I was thinking we would make over a bookshelf, but then we found this storage cube shelf and it was already pink! Normally, $50-$60 for one of these bad boys, we walked on a $20 sale at Fred Meyer. Plus we had an extra 15 percent off coupon for housewares. [They had blue too, and I'm still kicking myself for not buying a couple when they were so cheap.]

The whole thing was pink, so we lined the shelves with wood-grain contact paper to give the house wood floors before assembling the shelf.
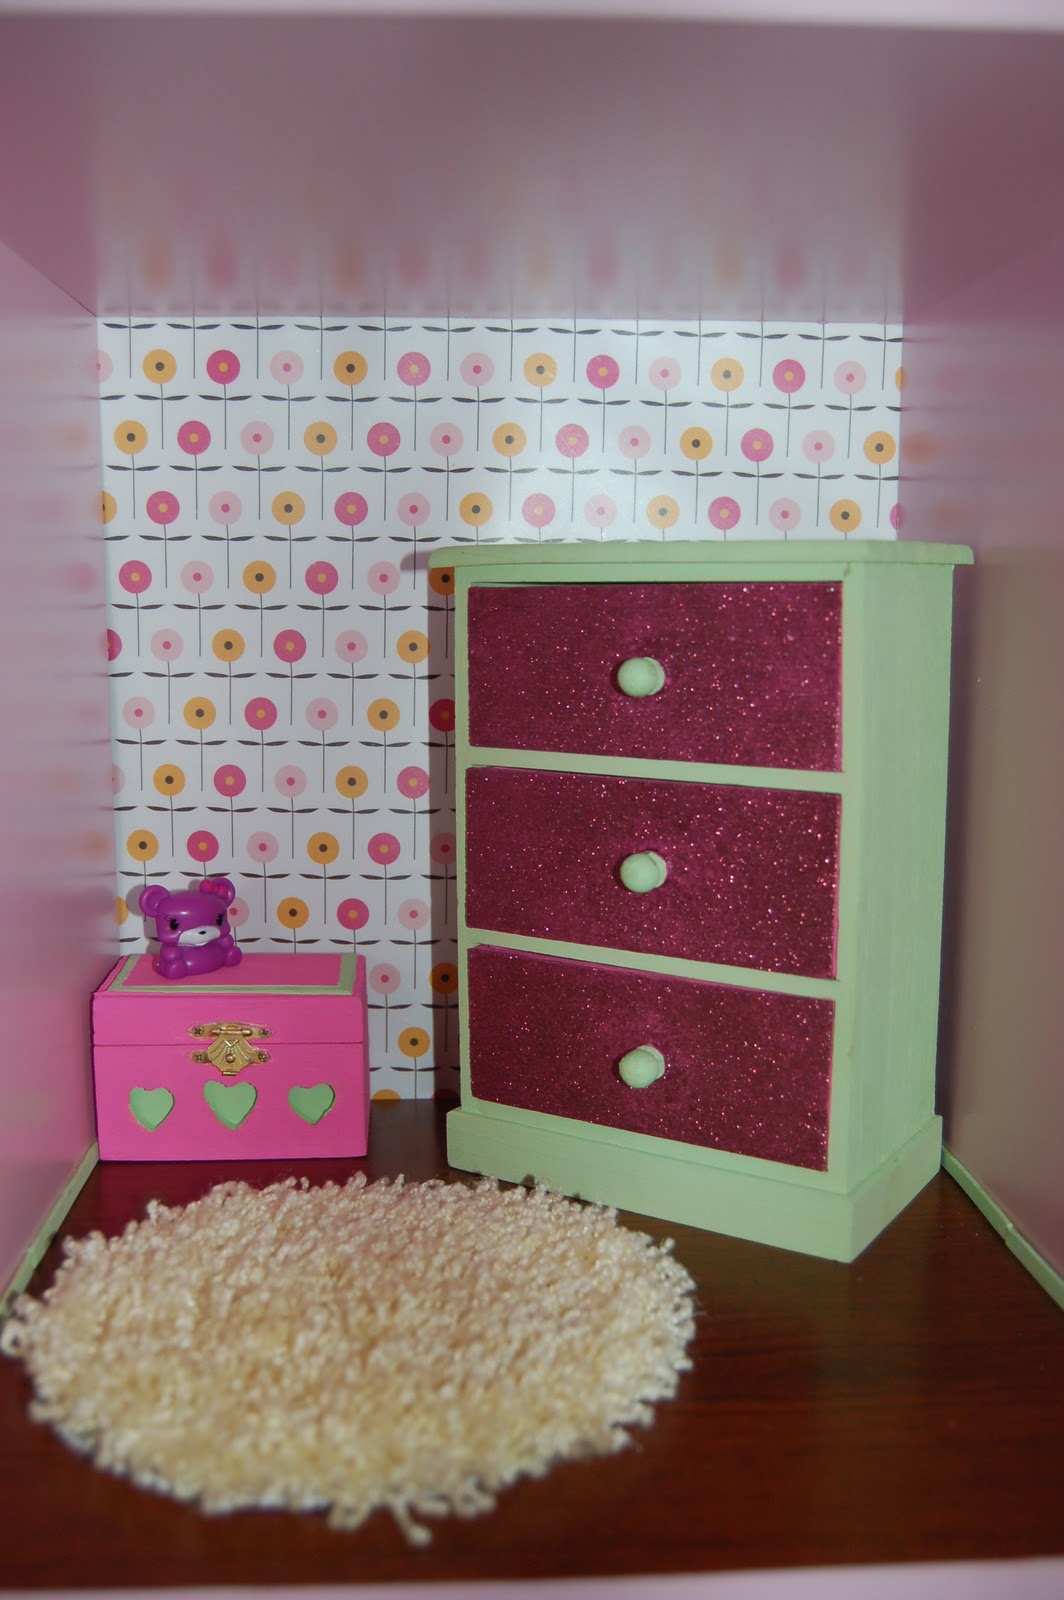
We bought a variety pack of scrapbook paper at the craft store and covered the back panels with the "wall paper" using clear contact paper to adhere it and give them a protective coating.
 I found a few unfinished wood jewelry/notions boxes at JoAnn's fabrics that made excellent furniture with a little acrylic paint.

For area rugs we cut circles and rectangles out of a bathroom rug from the Fred Meyer home section.
We painted balsa wood strips mint green and glued them to the corners to create molding to give the rooms a finished look.
Santa somehow knew the girls were getting a Barbie dream house and brought the girls furniture sets like this bathroom set complete with a flat-screen TV mounted to the towel rack. Barbie is apparently one classy gal.

 For a roof, we used a flag case from Michael's craft store.
They seemed to like it.

Sunday, December 19, 2010

A DIY Christmas

I don't know if it's the holidays or the 18 hours of darkness a day and single-digit temps, but I get the crafty bug this time of year. My Christmas decorating started on Thanksgiving Day when I hit a 5-9 p.m. sale with a couple friends and picked up this red and gold potpourri for my interchangeable centerpiece

1. With the leftover potpourri, I filled these martini glasses on my wine rack. It was the only other place I could think of displaying the stuff where my kitties wouldn't get into it ... which could be very bad for them. I also really wanted a poinsettia this year, but skipped it for the same reason.

2. I love this centerpiece because I can change it's look every season. This year, the potpourri with the gold candle to top it off.
This year I did a couple simple sewing projects.

3. New Christmas stockings for the boys so we would have a suedo-matching set. My mom made mine (center) and has lasted the years. I used red felt, green fleece and the silly reindeer trim for Joshua and Davin's stockings. I should have known that fleece is impossible to embroider names on, but wasn't thinking about that when I purchased it. Still searching for a way to add names.

4. A new Christmas tree skirt. I've never had one and have always improvised with a holiday tablecloth. This year I bought two yards of red felt and the snowball trim to finish the zig-zag edge. It cost less than $20 and was finished in one evening.
5. This is not my project, but one of Davin's classmates made him this tabletop tree and glued candy and fruit-rollups to it. Very creative and generous.

6. One of my favorite ornaments made by my mother has gotten several compliments from visitors this year. I was so inspired by the beaded ornaments that I was thrilled to find a beaded wreath kit at the craft store this year.

7. I knocked out about 12 of these beaded wreath ornaments with my feet kicked up watching Dexter one evening. They are shockingly similar to the ones my mom made for our tree when I was too young to remember.

I hope you're having a fun and creative holiday season regardless of how you decorate and celebrate.

My website

I recently purchased a URL to host my professional portfolio.

KernThisStudio.com


It's very simple at the moment, but a start for displaying my design work and portrait photography and hopefully drum up some additional freelance work. I did a couple family photo shoots this month and a newborn photo session. Also, I designed Christmas cards for the families, save the dates for engaged friends and have two more photo shoots in the coming weeks. This new project has been a whirlwind of fun and I'm excited to see where it goes.


I will still be blogging here about my Alaskan adventures, family fun and personal projects.As Kern This has been my blog, twitter name and phrase for many creative things over the years, it seemed like the natural choice for my portfolio and brand. To avoid confusion I'm going to need a new name for my personal blog.

For the non-design geeks out there. Kern This is a play on words involving design. To kern is to adjust the space between letters in typography.

Thanks for reading and please take a moment to stop by my portfolio when you have a moment. I'll be updating frequently. But don't stop checking in here. Thanks to my friends and family for all the support.

Thursday, December 2, 2010

Beyond the Road Calendar


MY LATEST PROJECT: With the help of Alaska Newspapers' amazing photo editor I designed this 2011 calendar at work this fall. It features images from across Alaska inspired by the Beyond the Road photo feature from First Alaskans magazine. Above is the cover and below is the back with thumbnails of the spreads. It's my first calendar and I'm extremely happy with how it turned out. However, it's easy to design with such amazing photos.

Our web editor is working on getting online purchasing information up. I'll update with post with a link when it's ready.